CLICK HERE FOR FREE BLOGGER TEMPLATES, LINK BUTTONS AND MORE! »

Thursday, October 23, 2008

Halloween Card


Happy Halloween! Since I have no kids left at home for Halloween I thought I would make some cards for my grandkids.

  • For the background paper I used dark orange cardstock and used my versa mark pad with stamps from Studio G.
  • I stamped the same design with versa mark ink pad on yellow cardstock and then embossed with black embossing powder.
  • The floss wrapped around the card is from Karen Foster called Scrapper's Floss.
  • I cut the bottom on the orange cardstock with fancy scissors and then ink the bottom of the cut.
  • I used dimensional dots under the yellow and black cardstock.

Monday, October 20, 2008

SISTERS NIGHT OUT

Nancy and Lisa
***
Leslie and Carrie
***
My sister Leslie (bottom left) took us all out for a nice evening. It's not very often that all of us sisters can get together. Leslie took us to see a play called "Girl's Room". This play had some very good actors and it made it seem you were really watching their life. She got us these really great seats, middle section, second row! After the play she took us all out to Dinner at this very nice restaurant. It's so nice to be together again and just talk. Even though we don't always agree on our political views or religion, we do love each other very much and we would do anything for each other. Now that my brother has retired from the Fire Department, we will have to get him to come down from Vegas and join us! That would be a blast!
I feel blessed to have such good sisters and brother. They are all really good people and I love them very much.


Tuesday, October 14, 2008

Cuttlebug Leaves


Directions for this card:
The leaves are from the Cuttlebug embossing folders.
Emboss your cardstock with your cuttlebug and folder
Sponge leaves using a olive green ink pad
Sponges branches using a light brown ink pad
Cut out embossed leaves using scissors and an xacto knife
adhere to card
Use diamond glaze on the leaves for dimension
I used 3D tape under the white cardstock
I used a circle punch for the corners. Just cut the tip of the corner in your circle punch.

Monday, October 13, 2008

Our 30TH Wedding Anniversary


On October 14, 1978 we started our Marriage.

30 years later we have a wonderful family.

We have Five children and 9, soon to be 10 grandchildren.


Life has been great!


We celebrated by spending a few days in Corona Del Mar.

We also had some fun at Universal Studios.

And of course we ate at our favorite place

Black Angus. Everything was perfect!


Tuesday, October 7, 2008

Birthday Card


I made this card for my son's 29Th birthday.
The background is a cuttlebug embossed folder.

In Utah again...

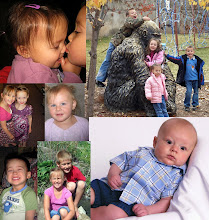
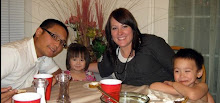
I have been in Utah for the past 10 days taking care of some business and visiting my family. This is a picture of my sweet little grandsons. They are so cute and fun to be with. I had such a hard time leaving them! We had a picnic at the park and all 9 of my grandkids were there Ü

Wednesday, September 24, 2008

Cuttlbug Embossed Prima Card


I like to find new ways to use my craft supplies. I have a good assortment of Prima flowers and I thought what would happen if I ran it through the cuttlebug. Well I was pleasantly surprised and pleased with the results. Here is what I did...

  • Put your basic design together on how you want to lay your flowers.
  • I used cardstock to lay my flowers on.
  • Now to adhere the Primas to the cardstock. I used a liquid adhesive on the primas. Not to much though, you don't want it to squesh out when you run it through the cuttlebug.
  • Run the cardstock with the primas already adhere through the cuttlebug.
  • When I glued the primas I did a light coat and some of them will stick up. I wanted them to lay flat so I put decoupage over the flowers.
  • Now it's time to put your embellishments on the flowers. You can use buttons, brads, what ever you like.
  • I added fiber to the card.
  • I used my Fiskras scallop punch for the border.

Monday, September 22, 2008

Mini Backpack Box


Isn't this little backpack the cutest thing. Of course I had to make one. I got this idea from Stamp Happens http://www.stamphappens.com/stamp_happens/2008/08/mini-backpack-r.html . She has a nice template to print out. This is my first one that I made. I have all sorts of ideas that you could do with these. One is to fill them with candy for the grandkids Ü

Wednesday, September 17, 2008

Remember Shaker Cards?

This is another one of the cards we made at church a few nights ago. Paulene had these cute shaker card kits put together. I haven't made a shaker card in years. One thing interesting that she had in her kit was fun foam for the dimension between the acetate and cardstock. Paulene bought a sheet of fun foam that has adhesive on one side and she cut them into strips. Good idea and pretty cheap!

Sunday, September 14, 2008

Double Embossed Card


I tried something new with my Cuttlebug embossing folder today. I will put the directions in steps. It looks so nice and glazy...
Double Embossed Card
1. Emboss a 4 1/4 x 5 1/2 cardstock with one of your Cuttlebug embossing folders.
2. Rub a versamark pad or embossing pad all over the embossed cardstock. make sure you get into the crevasses.
3. With clear embossing powder cover the whole cardstock.
4. Heat with your heat gun.
5. cut to fit your card.
6. Stamp your cupcake on plain cardstock.
7. Use your versamark or embossing pad on the bottom half of the cupcake.
8. Cover with embossing powder and heat with the heat gun.
9. Stamp the cupcake image on pattern paper for the top of the cupcake and cut out only the top part and attach to the cupcake.
10. I added diamond glaze to the dots on the cupcake for dimension.
The stamp set is from Inkadinkado.

Friday, September 12, 2008

Scarecrow Card


I made this card at our Enrichment meeting at church last night. Paulene had some really cute kits put together. She taught us how to make the distressed fence. We scored the lines on brown paper that has a white core. Close to my heart is the paper she had in her kits. We then sanded in both directions over the lines we embossed. You do this on the side that is raised. Then we did the same to the strip of brown that is on top of the fence. But there is no embossing on this strip, just sanding. For the scarecrow I used colored pencils with gamasol. The stamps are CTMH.
Wednesday, September 10, 2008

Family Tree Layout


I got together with some friends this week (New ones and old ones) and we all made a Family Tree layout with the Cricut. I am not sure which cartridge was used for the tree but the leaves were from Walk in My Garden Cartridge. I inked the edges of the smallest leaves and I added some of those dew drops. I used the Tear Drop cartridge for the vinyl letters. This was a very fun project. I still have to add the family names on the leaves.

Monday, September 8, 2008

Dahila Flower Card


These are really cute flowers to make for any card or scrapbook page. They are very easy to make. Here is a video I found on how to make them http://www.youtube.com/watch?v=PCxI23P9m-Q&eurl=http://dawnsstampingthoughts.typepad.com/dawns_stampin_studio/

On my card I also did scoring with my scor-it. I used my Fiskras scallop punch along with paper tearing. The big white brad is from Bazzil. I also ink the edges of the scallops and the paper tearing and on the flower.

Wednesday, September 3, 2008

Monkey Card


When I saw Kristina Werner's card I just had to make my own! She even gives you a nice little template to use. I used this cute little monkey stamp from Hero Arts (clear stamp) the dots are from SU. This is a super fun card. Go check out Kristina's blog, she has a video on it Ü

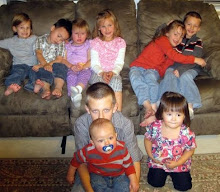
I'm missing the fun!


My two daughters and daughter in-law and all their kids got together for dinner last sunday and this is what I missed out on! All nine of my grandkids and their sweet little smiles!